|
 June
6th 1944 June
6th 1944
D-Day
Pts. 1-4
P-51 Mustang
P-47 Thunderbolt
AeroMaster Decals
|
S u m m a r y
|
| Catalogue
Number: |
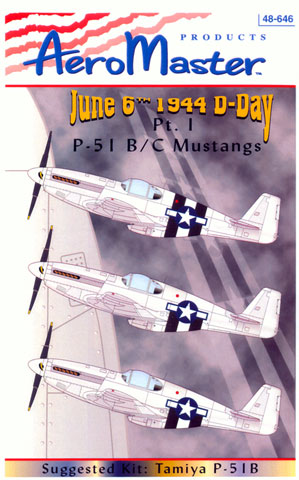
AMD48-646 – P-51B/C D-Day
Invasion Stripes.
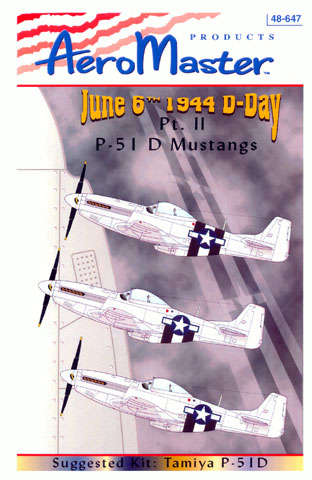
AMD48-647 – P-51D D-Day Invasion Stripes.
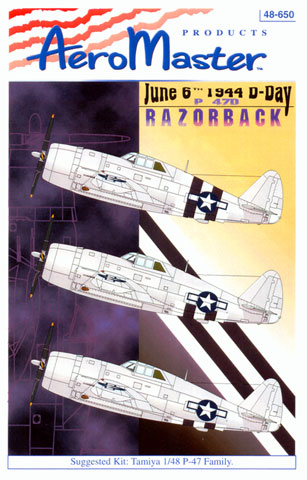
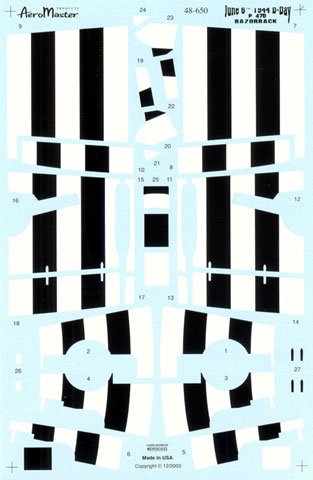
AMD48-650 – P-47D Razorback D-Day Invasion Stripes.
AMD48-651 – P-47D Bubble Top D-Day Invasion Stripes. |
| Scale: |
1/48 |
| Contents and Media: |
Waterslide decals plus
instructions and notes |
| Price: |
each
USD$7.97 from Squadron.com |
| Review Type: |
FirstLook |
| Advantages: |
Helpful and simple way to
add invasion stripes; useful range of US fighters covered; high
quality printing and presentation. |
| Disadvantages: |
|
| Recommendation: |
Recommended |
Reviewed
by Rodger Kelly

Aeromaster's 1/48 scale
Invasion Stripes are available online from Squadron.com
|
Ever wanted
to build that killer P-51 or P-47 in D-Day markings but were put off by
the thought of trying to mask and paint over a natural metal finish?
Well AeroMaster has come to your rescue with the issue of four sheets
covering both razor back and bubble top P-51s and P-47s that makes the
task a breeze.
 But
firstly, just what were these black and white stripes all about and why
were they applied to allied aircraft during the first week of June 1944? But
firstly, just what were these black and white stripes all about and why
were they applied to allied aircraft during the first week of June 1944?
AeroMaster's placement guide says it all. I quote:
"By June 6, 1944, the
Allies had achieved air supremacy in the skies over Western Europe. Proof
of this fact is that only two Luftwaffe aircraft flew over the Normandy
beaches and made a light hearted strafing pass on 6/6/44. These two
airplanes were flown by Oberst 'Pips' Priller and his wingman.
However, during the
planning of the Normandy landings, allied commanders feared the
possibility of tremendous aircraft losses due to friendly fire. Something
had to be done to avoid confusion. Therefore, it was decided to mark
every aircraft operating over the beaches with distinctive black and white
stripes around the wings and the fuselages.
Specific markings were
designed for each type of aircraft and, as it is always the case, many
variants appeared. These variants differed in size, position and neatness
of application. In all fairness to the ground crews, we must realize that
these stripes were painted in a time span of 12 to 36 hours prior to the
early hours of the invasion. Some were neatly applied, while others
looked like they were painted after a few good English beers in the local
pub with mops and rollers!
Full invasion markings
lasted very little (approximately 3-4 weeks). Then, sections were taken
out with the excuse that the markings made the aircraft very conspicuous
when viewed from above. The first areas to be re-camouflaged were the
upper surfaces, with bands sometimes being removed, sometimes just painted
over. In the last case, occasionally there was a colour difference on the
areas covering the white or black. At times, the national insignia was
edged with natural metal outline (mostly on the fuselage area)."
The individual sheets are:
- 48-646 – P-51B/C.
- 48-647 – P-51D.
- 48-650 – P-47D Razorback.
- 48-651 – P-47D Bubble Top.
A complete set of markings are supplied on each sheet
along with the more common variations.
 P-51
Sheets P-51
Sheets
48-646 –
P-51B/C and
48-647 – P-51D
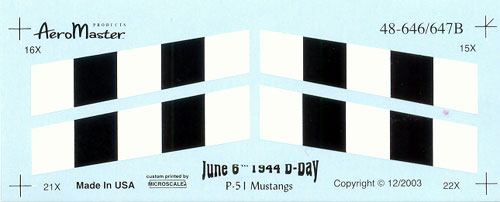
As well as both upper and lower wing surfaces (with
separate decals for the flaps - two sets of each) The P-51 sheets offer
full fuselage white-black-white–black-white stripes as well as the half
fuselage ones and the abbreviated half fuselage black-white-black option.
The white on the tail wheel doors are supplied as
decals as are the main gear doors (two sets of each).
Mixed up amongst the stripes are two sets of theatre
bands for the horizontal stabilizers, a black set for natural metal/silver
lacquer finished machines and a white set for earlier olive drab over
neutral grey P-51s. Note that these are not D-Day markings but they are
nice to have anyway!
A further advantage of the P-51 sheets is that you
don't have to be as diligent in polishing out the sanding marks after
eliminating the seam in the smaller vent door as the decal will cover up
any unpolished plastic that would normally stand out if you were to paint
it with metal finish type paint.
Judicious use of this set and reference to
photographs will result in you being able to model at least three
different aircraft from this sheet.
P-47D
Sheets
48-650 –
P-47D Razorback and
48-651 – P-47D Bubble Top
As with the P-51 sheets, a single complete set of
markings are supplied as well as abbreviated mid fuselage and lower
fuselage stripes.
Separate decals are provided for the main gear doors
(a single set this time and in three parts) as well as the tiny white
portions for the tail wheel doors. The flaps are also supplied as
separate decals with the "hinges" even getting their own separate decals.
The problem of the pylon being within the outboard stripes is solved by
the supply of a separate decal to butt up against them.
Unfortunately, you will have to paint the turbo
charger doors and turbo exhaust yourself as AeroMaster has not supplied
them citing that it was not possible to supply all of the many possible
variations in D-Day stripe application seen on P-47s. The latter doesn't
seem to be a problem as many of them don’t seem to have been painted at
all – check you references first!
All sheets feature small separate blocks of both
black and white decals to enable you to repair any goofs that you may
encounter in application of the larger decals.
The decals have been printed by Microscale and are
certainly up to their high standards. Extra attention seems to have been
paid during the printing process as the film surrounding each design is at
an absolute minimum so as it doesn't pose a problem when applying them.
The placement guides show the various applications of
the fuselage stripes as well as full upper and lower surface plan views.
The decals and placement guides come packed in a
clear plastic zip-loc bag.
The sheets have been specifically tailored to fit the
Tamiya kits but (to quote the placement guide again) "We know that most of
you will be able to adjust them to fit the Hasegawa models with a bit of
patience, care and a sharp Ex-Acto knife."
Click the
thumbnails below to view larger images:
Variations in the application of D-Day markings
abounded, no doubt due to different interpretations of the application
order and the time spent in applying them, so to quote the sage advice of
a old Army friend of mine "time spent in reconnaissance is time seldom
wasted".
The Internet is a wonderful thing and simply typing
in D-Day+Mustang or D-Day+Thunderbolt into a search engine will return
many images that you can study. Avoid using modern day warbird
restorations as a reference as they are not always right. You are far
better off relying on WWII photographs.
Nice stuff from AeroMaster!
Recommended.
Thanks to AeroMaster
/ Eagle Strike Products for the review sets
On-line sales are
available from the
AeroMaster Products /
Eagle Strike Productions web site.
Review TextCopyright © 2004 by
Rodger Kelly
This Page Created on 19 February, 2004
Last updated
19 February, 2004
Back to
HyperScale Main Page |
 Home | What's
New | Features
| Gallery |
Reviews | Reference
| Forum
| Search
Home | What's
New | Features
| Gallery |
Reviews | Reference
| Forum
| Search