|
S u m m a r y
|
| Catalogue
Number: |
Tally Ho! Decals #48-030,
Avia S-99/C-10 in Czech Service |
| Scale: |
1/48 |
| Contents and Media: |
Decals and instructions |
| Price: |
GBP£6.50
online from Hannants
and retailers worldwide |
| Review Type: |
FirstLook |
| Advantages: |
Interesting
and unusual subjects; well printed and in register;
detailed stencil data supplied; good instructions |
| Disadvantages: |
No bottom views in
instructions; some questions remain about appropriate colors |
| Recommendation: |
Recommended. |
Reviewed
by Jim Baker

Tally Ho! 1/48 scale Avia S-99 decals are available online from
Squadron
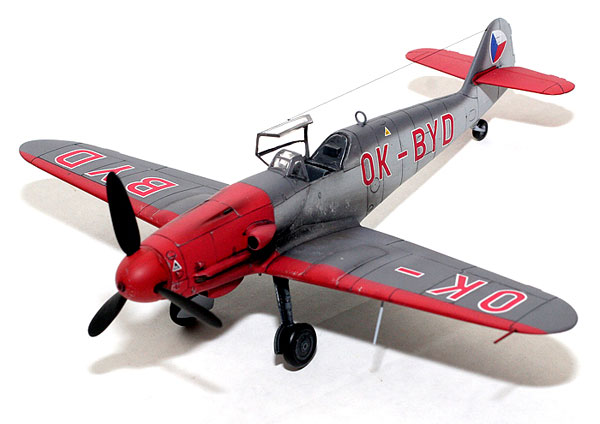
Those who know me know that I have a weakness for weird markings.
So when I received this decal sheet in the mail, I looked through my
stack of kits and realized that my Monogram Bf-109G-10 REALLY wanted
to be this airplane. It's like the kit and the decal sheet were made
for each other -- it was a "John! Marsha!" moment in the biggest
baddest way. We all know about the quality of the Monogram
Bf-109G-10 kit -- simple, easy to build and as far as I can tell
(I'm not a rivet counter unless I need to be) spot on accurate. As I
have of late been afflicted with a severe case of Advanced Modeler
Syndrome (AMS), I decided that this was the perfect subject to build
as therapy.

According to a couple of websites I surfed through in looking for
any information on these airplanes, the Germans were originally
producing the Bf-109G-10 in Czechoslovakia towards the end of the
war, and when the war ended the Czechs simply picked up production
where the Germans left off. There were only a few S-99s built before
the warehouse holding the Daimler-Benz engines burned to the ground
and necessitated the adaptation of the Bf-109G airframe to take the
Junkers Jumo engines originally intended for He-111 bombers,
resulting in the nasty S-199 which everyone immediately hated.

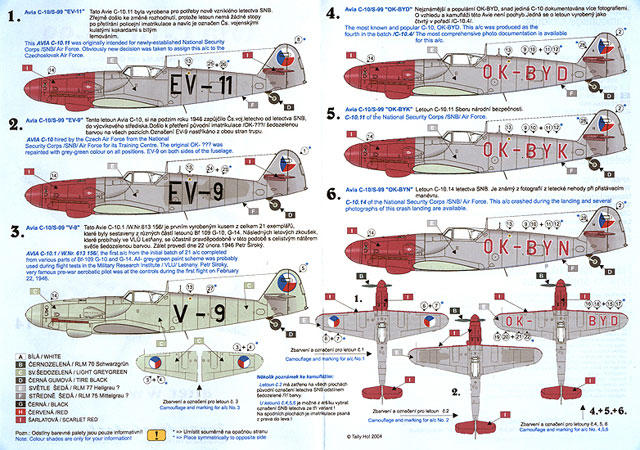
Since this is a subject I was not familiar with, I relied heavily on
the instructions supplied with the sheet in creating my model. There
are no bottom views of the airplanes, so it was my best guess to put
the same set of codes on the undersides of the wings as well as on
the tops. Also, color information is limited to the exterior of the
airplanes. Since the factory that produced these airframes was
originally German, I applied German colors throughout. I painted the
cockpit and wheel wells RLM66 -- mainly because I didn't feel like
cleaning out my airbrush to spray RLM02 on the wheel wells. Per the
instructions, I painted the airplane RLM77 under RLM75, and the red
parts are RLM23 Red, all Polly-Scale colors (actually, to be
completely honest, I couldn't find any Polly-Scale RLM77 and a
friend told me that Light Ghost Grey would work fine, so I used that
-- it looks good enough to me). Breaking from the German tradition
(and because I have no sources for Czech fighters), I did paint the
propeller black.
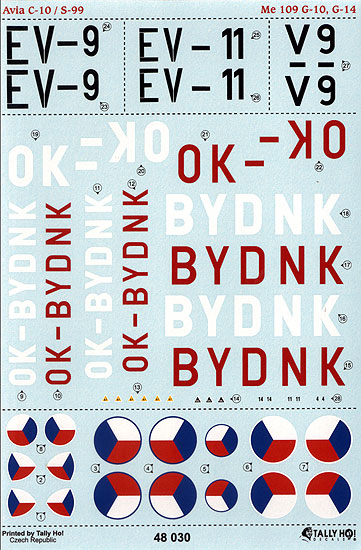
 The
decal sheet is beautifully printed, perfectly in register, and thin,
and the colors are crisp and vibrant. Enough decals are provided to
make at least four different airplanes, so if you're all about the
Czech Air Force then you're in luck. The red and white codes are in
two parts, the white being applied first and then the red over the
top of the white. The white is reasonably opaque, since they are
applied over a light color anyway, and the red matches almost
perfectly the Polly-Scale RLM23 I used for the Red surfaces of the
airplane. The
decal sheet is beautifully printed, perfectly in register, and thin,
and the colors are crisp and vibrant. Enough decals are provided to
make at least four different airplanes, so if you're all about the
Czech Air Force then you're in luck. The red and white codes are in
two parts, the white being applied first and then the red over the
top of the white. The white is reasonably opaque, since they are
applied over a light color anyway, and the red matches almost
perfectly the Polly-Scale RLM23 I used for the Red surfaces of the
airplane.
In addition to the codes, Tally-Ho provides national insignia and
a small selection of stencil decals, such as the octane markings for
fuel filler ports instead of only the specialized markings, so that
the modeler can use only their decal sheet to make the model. I like
this because different companies interpret different colors
differently, and including the national insignia makes it so that
the colors match.
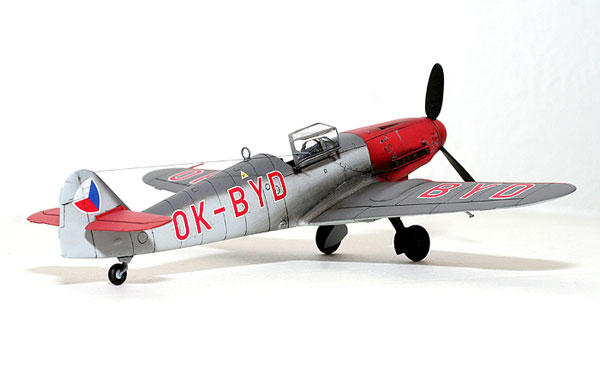
In application, the decals went on flawlessly. The white outline is
perfectly matched to the red insides, keeping the codes in register.
A half-solution of Solvaset and water makes the decals snuggle right
into the surface beautifully. After gloss-coating the model with
Polly-Scale Gloss, I applied first the white surrounds and the tail
insignia, and then once that was mostly set up I applied the red
parts of the codes. I then sliced the panel lines with a hobby knife
and applied a little more setting solution to make the decals set
into the panel lines. After the codes were on, I applied the rest of
the small decals. A little Polly-Scale Flat -- the best flat coat on
the planet -- and the decals were finished. And then the rest of the
build, which of course went basically perfectly since it's the
Monogram kit.

In summary, the only downsides to this decal set are as follows:
-
Everyone's going to either think
it's a Bf-109G-10 or that you've erroneously marked a 109 as an
S-199 because not many people know what an S-99 is.
-
No bottom views on the color
charts
-
I don't have any interior color
references for Czech airplanes, and I don't know whether the
prop was Schwarzgrun or black.
Otherwise these are among the best decals I've ever used, and
they make a very, very unusual subject.
|
Home | What's
New | Features
| Gallery |
Reviews | Reference
| Forum
| Search